HyperFrames 中文从 0 到 1 完全使用教程
HyperFrames 中文从 0 到 1 完全使用教程
这篇教程面向第一次接触 HyperFrames 的开发者和 AI Agent 使用者。读完后,你会理解 HyperFrames 的基本模型,能从空项目创建一个视频,完成预览、校验、渲染,并能用三组递进案例从简单标题动画扩展到多场景、可参数化的视频项目。
配套可运行项目位于
./hyperframes-zero-to-one-projects/,本文中的案例截图均由这些项目实际运行后生成。
1. 认识 HyperFrames
HyperFrames 是一个把 HTML、CSS、媒体文件和可 seek 动画渲染成视频的开源框架。你写的不是传统剪辑软件里的拖拽时间线,而是一份可以被浏览器打开、可以被代码生成、也可以被 AI Agent 修改的 HTML 视频工程。
核心思路:
- HTML 是视频源文件:文字、图片、视频、音频、子场景都写在 HTML 里。
data-*属性定义时间线:元素什么时候出现、持续多久、在哪条 track 上,都由声明式属性控制。- CSS 控制画面:布局、颜色、层级、字体、背景效果都按网页方式编写。
- GSAP 等动画库负责可 seek 动画:渲染器可以跳到任意时间点捕获画面,保证逐帧确定性。
- CLI 负责预览和渲染:本地浏览器预览,最终用 Chrome + FFmpeg 渲染成 MP4 或 WebM。
适合场景包括产品介绍、功能发布、数据可视化、社媒短视频、字幕卡,以及“文档/CSV/网页 → 视频”的 AI 自动化视频流水线。
2. 环境准备
HyperFrames 本地使用需要这些工具:
| 依赖 | 要求 | 用途 |
|---|---|---|
| Node.js | 22 或更高 | 运行 npx hyperframes CLI |
| npm / npx 或 bun | 任一即可 | 安装和执行命令 |
| FFmpeg | 推荐 7.x 或更高 | 把捕获帧编码成视频 |
检查 Node.js:
node --version
检查 FFmpeg:
ffmpeg -version
安装 FFmpeg:
brew install ffmpeg
sudo apt install ffmpeg
winget install ffmpeg
确认 CLI 可运行:
npx hyperframes --help
如果渲染失败,优先运行环境诊断:
npx hyperframes doctor
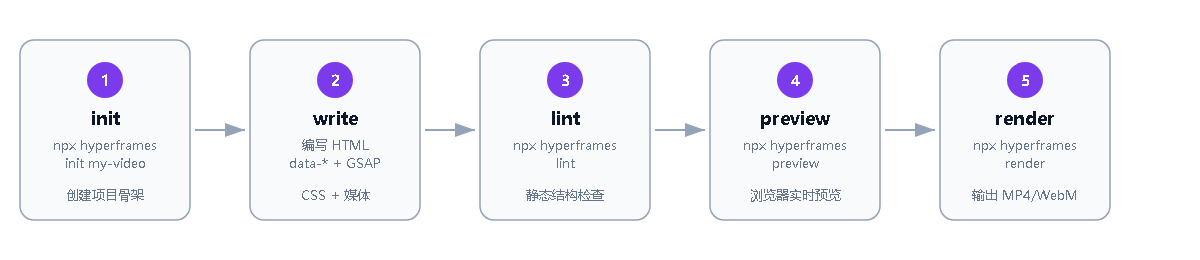
3. 创建第一个项目
交互式创建项目:
npx hyperframes init my-video
cd my-video
从最小空白项目开始:
npx hyperframes init my-video --non-interactive --example blank
cd my-video
典型项目结构:
my-video/
  meta.json
  index.html
  compositions/
  assets/
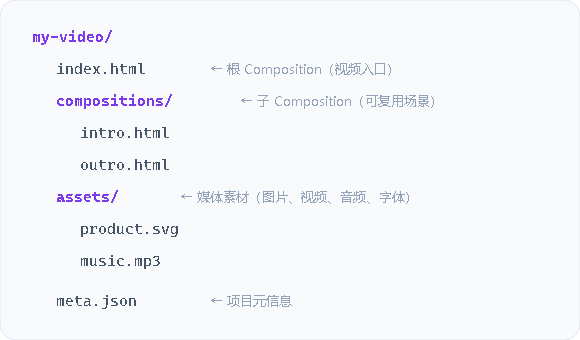
| 路径 | 作用 |
|---|---|
index.html | 根 Composition,视频入口文件 |
compositions/ | 可复用子 Composition,例如 intro、outro、字幕层 |
assets/ | 图片、视频、音频、字体等素材 |
meta.json | 项目元信息 |
启动预览:
npx hyperframes preview
渲染视频:
npx hyperframes render --output output.mp4
4. 配套项目如何运行
本教程已经按三个案例创建了可运行项目,统一放在:
./hyperframes-zero-to-one-projects/
  title-demo/
  product-demo/
  campaign-video/
运行任意项目的方式相同。以案例 1 为例:
cd ./hyperframes-zero-to-one-projects/title-demo
npx hyperframes lint
npx hyperframes validate
npx hyperframes preview
npx hyperframes render --quality draft --output renders/title-demo.mp4
预览启动后,在浏览器打开 Studio 地址,例如:
http://localhost:3002/#project/title-demo
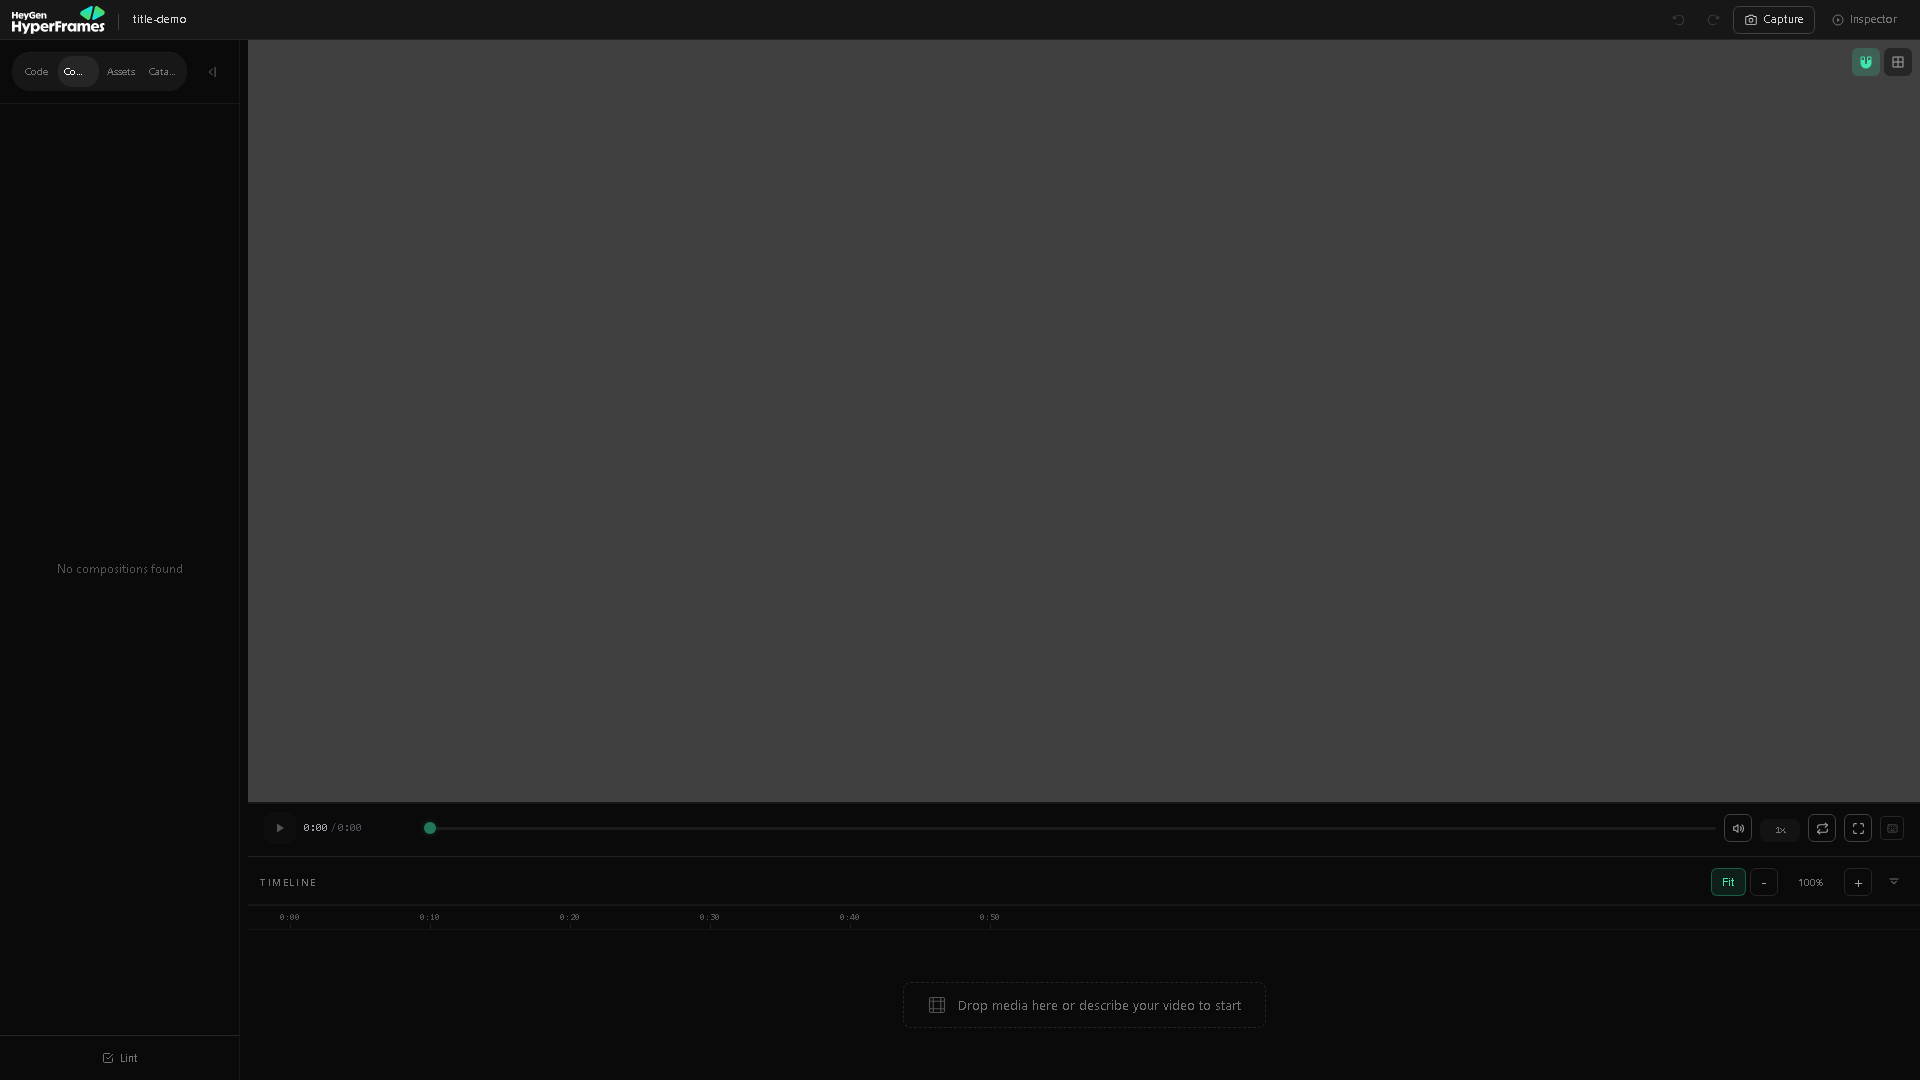
后面的三个案例都可以直接打开对应目录运行,不需要再手动从零复制代码。文档保留关键代码,是为了方便你理解每个项目的结构。
5. 核心概念
Composition:视频画布
Composition 是 HyperFrames 的基本场景单位。根 Composition 通常写在 index.html 中:
<div
  id="root"
  data-composition-id="root"
  data-start="0"
  data-width="1920"
  data-height="1080"
>
  <!-- Clips go here -->
</div>
关键属性:
data-composition-id:Composition 的唯一 ID。data-width/data-height:视频尺寸,例如横屏1920x1080,竖屏1080x1920。data-start:根 Composition 通常从0开始。
Clip:时间线元素
Clip 是时间线上会出现的一段内容,可以是文字、图片、视频、音频或子 Composition。
<h1
  id="title"
  class="clip"
  data-start="0"
  data-duration="5"
  data-track-index="0"
>
  你好,HyperFrames
</h1>
关键规则:
- 定时元素必须加
class="clip",这样运行时才能管理显示和隐藏。 data-start表示开始时间,单位是秒。data-duration表示持续时间,单位是秒。data-track-index表示时间线 track,同一 track 上的 clips 不能重叠。
Track:时间线冲突,不是视觉层级
data-track-index 用于组织时间线,避免同一 track 上出现时间重叠。它不等于 CSS 层级。如果你想控制谁盖在谁上面,使用 CSS z-index。
Timing:绝对时间和相对时间
绝对秒数:
<div id="intro" class="clip" data-start="0" data-duration="3" data-track-index="0"></div>
<div id="main" class="clip" data-start="3" data-duration="5" data-track-index="0"></div>
引用另一个 clip 的结束时间:
<div id="intro" class="clip" data-start="0" data-duration="3" data-track-index="0"></div>
<div id="main" class="clip" data-start="intro + 0.5" data-duration="5" data-track-index="0"></div>
这里 main 会在 intro 结束后 0.5 秒开始。
GSAP:可 seek 动画
HyperFrames 常用 GSAP 写动画。重点是:timeline 必须暂停,并注册到 window.__timelines。
<script src="https://cdn.jsdelivr.net/npm/gsap@3/dist/gsap.min.js"></script>
<script>
  const tl = gsap.timeline({ paused: true });
  tl.from("#title", { opacity: 0, y: 40, duration: 0.8 }, 0);

  window.__timelines = window.__timelines || {};
  window.__timelines["root"] = tl;
</script>
Variables:一份模板,多次渲染
Variables 让同一个 Composition 可以用不同标题、颜色、CTA、图片进行渲染。
<html
  data-composition-variables='[
    {"id":"title","type":"string","label":"Title","default":"AI 视频发布"},
    {"id":"brandColor","type":"color","label":"Brand Color","default":"#7c3aed"}
  ]'
>
读取变量:
<script>
  const { title, brandColor } = window.__hyperframes.getVariables();
  document.querySelector("#title").textContent = title;
  document.documentElement.style.setProperty("--brand", brandColor);
</script>
渲染时覆盖:
npx hyperframes render --variables '{"title":"Q4 Product Launch","brandColor":"#2563eb"}' --output launch.mp4
6. 推荐开发闭环
写 HyperFrames 项目时,建议按这个顺序迭代:
npx hyperframes lint
npx hyperframes validate
npx hyperframes inspect
npx hyperframes preview
npx hyperframes render --quality draft --output draft.mp4
| 命令 | 用途 |
|---|---|
npx hyperframes lint | 静态检查 HTML 结构、时间线、属性问题 |
npx hyperframes validate | 在浏览器环境中验证运行时错误和缺失素材 |
npx hyperframes inspect | 采样检查画面布局,例如文字溢出、裁切、出画布 |
npx hyperframes preview | 启动 Studio 预览并热更新 |
npx hyperframes render | 渲染最终视频 |
迭代建议:写一小段就运行 lint;有卡片、字幕、密集文字时运行 inspect --samples 15;初稿用 --quality draft,交付用 --quality high。
7. 案例 1:最小标题动画
目标:创建一个 5 秒、1920x1080 的标题动画,理解 Composition、Clip、Timing 和 GSAP timeline 注册。
可运行项目:./hyperframes-zero-to-one-projects/title-demo
最终视频:./hyperframes-zero-to-one-projects/title-demo/renders/title-demo.mp4
如果你想复现项目创建过程,可以先创建空白项目:
npx hyperframes init title-demo --non-interactive --example blank
cd title-demo
配套项目已经写好 index.html,关键代码如下:
<!doctype html>
<html>
  <head>
    <meta charset="utf-8" />
    <style>
      html,
      body {
        margin: 0;
        overflow: hidden;
        background: #080a12;
        width: 100%;
        height: 100%;
      }

      [data-composition-id="root"] {
        position: relative;
        width: 1920px;
        height: 1080px;
        overflow: hidden;
        background:
          radial-gradient(circle at 30% 20%, rgba(124, 58, 237, 0.45), transparent 32%),
          linear-gradient(135deg, #080a12, #111827);
        color: white;
        font-family: Inter, ui-sans-serif, system-ui, sans-serif;
      }

      .title-card {
        position: absolute;
        inset: 0;
        display: grid;
        place-content: center;
        text-align: center;
        z-index: 2;
      }

      #title {
        margin: 0;
        font-size: 120px;
        line-height: 0.95;
        letter-spacing: -0.06em;
      }

      #subtitle {
        margin: 28px 0 0;
        font-size: 34px;
        color: rgba(255, 255, 255, 0.72);
      }
    </style>
  </head>
  <body>
    <div id="root" data-composition-id="root" data-start="0" data-width="1920" data-height="1080">
      <section id="title-card" class="clip title-card" data-start="0" data-duration="5" data-track-index="0">
        <h1 id="title">你好,HyperFrames</h1>
        <p id="subtitle">写 HTML,渲染成视频</p>
      </section>

      <script src="https://cdn.jsdelivr.net/npm/gsap@3/dist/gsap.min.js"></script>
      <script>
        const tl = gsap.timeline({ paused: true });
        tl.from("#title", { opacity: 0, y: 48, duration: 0.8, ease: "power3.out" }, 0);
        tl.from("#subtitle", { opacity: 0, y: 24, duration: 0.7, ease: "power3.out" }, 0.35);
        tl.to("#title-card", { opacity: 0, scale: 0.98, duration: 0.6, ease: "power2.in" }, 4.2);

        window.__timelines = window.__timelines || {};
        window.__timelines.root = tl;
      </script>
    </div>
  </body>
</html>
检查并渲染:
npx hyperframes lint
npx hyperframes validate
npx hyperframes render --quality draft --output title-demo.mp4
从截图可以看到:背景渐变、右下角光球、标题和副标题都来自同一个 index.html,它们通过 class="clip" 加入时间线,并由 GSAP 控制淡入、上移和结尾淡出。

你现在已经完成了第一个 HTML 视频。
8. 案例 2:图文产品介绍
目标:创建一个 8 秒产品卡片视频,加入图片、卖点列表和 CTA,理解多 track、错峰动画、相对时间和视觉层级。
可运行项目:./hyperframes-zero-to-one-projects/product-demo
最终视频:./hyperframes-zero-to-one-projects/product-demo/renders/product-demo.mp4
本案例已经内置离线素材:./hyperframes-zero-to-one-projects/product-demo/assets/product.svg,不依赖远程占位图。
<!doctype html>
<html>
  <head>
    <meta charset="utf-8" />
    <style>
      html,
      body {
        margin: 0;
        overflow: hidden;
        background: #f8fafc;
        width: 100%;
        height: 100%;
      }

      [data-composition-id="root"] {
        position: relative;
        width: 1920px;
        height: 1080px;
        overflow: hidden;
        background: linear-gradient(135deg, #f8fafc, #e0e7ff);
        font-family: Inter, ui-sans-serif, system-ui, sans-serif;
      }

      .product-image {
        position: absolute;
        left: 170px;
        top: 190px;
        width: 620px;
        height: 700px;
        object-fit: cover;
        border-radius: 48px;
        box-shadow: 0 40px 120px rgba(15, 23, 42, 0.2);
        z-index: 2;
      }

      .copy-card {
        position: absolute;
        right: 170px;
        top: 190px;
        width: 780px;
        min-height: 620px;
        padding: 76px;
        border-radius: 56px;
        background: rgba(255, 255, 255, 0.78);
        box-shadow: 0 40px 120px rgba(15, 23, 42, 0.16);
        backdrop-filter: blur(24px);
        z-index: 3;
      }

      .eyebrow {
        margin: 0 0 22px;
        color: #4f46e5;
        font-size: 26px;
        font-weight: 800;
        letter-spacing: 0.12em;
        text-transform: uppercase;
      }

      h1 {
        margin: 0;
        color: #0f172a;
        font-size: 86px;
        line-height: 0.96;
        letter-spacing: -0.055em;
      }

      ul {
        margin: 42px 0 0;
        padding: 0;
        list-style: none;
        display: grid;
        gap: 20px;
      }

      li {
        color: #334155;
        font-size: 30px;
        line-height: 1.25;
      }

      li::before {
        content: "✓";
        margin-right: 16px;
        color: #4f46e5;
        font-weight: 900;
      }

      .cta {
        display: inline-block;
        margin-top: 54px;
        padding: 24px 36px;
        border-radius: 999px;
        background: #4f46e5;
        color: white;
        font-size: 28px;
        font-weight: 800;
      }
    </style>
  </head>
  <body>
    <div id="root" data-composition-id="root" data-start="0" data-width="1920" data-height="1080">
      <img
        id="product"
        class="clip product-image"
        data-start="0"
        data-duration="8"
        data-track-index="0"
        src="assets/product.svg"
        alt="产品预览"
      />

      <section id="card" class="clip copy-card" data-start="product + 0" data-duration="8" data-track-index="1">
        <p class="eyebrow">新品发布</p>
        <h1>几分钟搭好 AI 视频工作流</h1>
        <ul>
          <li>HTML 原生编排</li>
          <li>逐帧准确的 GSAP 动画</li>
          <li>本地用 FFmpeg 渲染</li>
        </ul>
        <span class="cta">开始制作</span>
      </section>

      <script src="https://cdn.jsdelivr.net/npm/gsap@3/dist/gsap.min.js"></script>
      <script>
        const tl = gsap.timeline({ paused: true });
        tl.from("#product", { opacity: 0, x: -90, rotate: -3, duration: 0.9, ease: "power3.out" }, 0);
        tl.from("#card", { opacity: 0, x: 90, duration: 0.9, ease: "power3.out" }, 0.25);
        tl.from(".eyebrow, h1, li, .cta", { opacity: 0, y: 26, stagger: 0.12, duration: 0.55, ease: "power3.out" }, 0.85);
        tl.to("#product, #card", { opacity: 0, y: -20, duration: 0.55, ease: "power2.in" }, 7.25);

        window.__timelines = window.__timelines || {};
        window.__timelines.root = tl;
      </script>
    </div>
  </body>
</html>
这个截图对应上面的三个关键功能:左侧本地 assets/product.svg 作为图片 clip,右侧 .copy-card 使用更高 z-index 盖在背景之上,文字列表和 CTA 通过 GSAP 的 stagger 依次入场。

检查布局时使用更密集采样:
npx hyperframes lint
npx hyperframes validate
npx hyperframes inspect --samples 15
npx hyperframes render --quality draft --output product-demo.mp4
如果你看到文字溢出或裁切问题,先改 CSS 布局,再重新运行 inspect。
9. 案例 3:多场景可参数化成片
目标:把视频拆成 intro、feature、outro 三个子 Composition,由根 index.html 串起来,并通过 Variables 改标题、字幕、品牌色和 CTA。
可运行项目:./hyperframes-zero-to-one-projects/campaign-video
最终视频:./hyperframes-zero-to-one-projects/campaign-video/renders/campaign-video.mp4
项目结构:
campaign-video/
  index.html
  compositions/
    intro.html
    feature.html
    outro.html
  assets/              # 可选:放 music.mp3 等音频素材
根文件:index.html
根文件负责声明变量并加载三个子场景。背景音乐是可选项:如果你有 assets/music.mp3,可以按注释自行添加 <audio>。
<!doctype html>
<html
  data-composition-variables='[
    {"id":"title","type":"string","label":"Title","default":"AI 视频发布"},
    {"id":"subtitle","type":"string","label":"Subtitle","default":"从提示词到 MP4 成片"},
    {"id":"brandColor","type":"color","label":"Brand Color","default":"#7c3aed"},
    {"id":"ctaText","type":"string","label":"CTA","default":"开始渲染第一个视频"}
  ]'
>
  <head>
    <meta charset="utf-8" />
    <style>
      html,
      body {
        margin: 0;
        width: 100%;
        height: 100%;
        overflow: hidden;
        background: #050816;
      }

      [data-composition-id="root"] {
        position: relative;
        width: 1920px;
        height: 1080px;
        overflow: hidden;
        background: #050816;
      }
    </style>
  </head>
  <body>
    <div id="root" data-composition-id="root" data-start="0" data-width="1920" data-height="1080">
      <div id="intro" data-composition-id="intro" data-composition-src="compositions/intro.html" data-start="0" data-duration="4" data-track-index="0"></div>
      <div id="feature" data-composition-id="feature" data-composition-src="compositions/feature.html" data-start="intro" data-duration="5" data-track-index="0"></div>
      <div id="outro" data-composition-id="outro" data-composition-src="compositions/outro.html" data-start="feature" data-duration="4" data-track-index="0"></div>

      <audio data-start="0" data-duration="13" data-track-index="1" data-volume="0.35" src="assets/music.mp3"></audio>
    </div>
  </body>
</html>
如果暂时没有 assets/music.mp3,可以先删除 <audio> 片段。
子场景:compositions/intro.html
外部子 Composition 必须用 <template> 包裹。
Intro 场景负责读取 title、subtitle、brandColor 三个变量,并把品牌色写入 CSS 变量 --brand,形成首屏主视觉。

<template id="intro-template">
  <div data-composition-id="intro" data-width="1920" data-height="1080">
    <div class="intro-bg"></div>
    <section class="intro-content">
      <p class="label">HyperFrames</p>
      <h1 id="intro-title"></h1>
      <p id="intro-subtitle"></p>
    </section>

    <style>
      [data-composition-id="intro"] {
        position: relative;
        width: 1920px;
        height: 1080px;
        overflow: hidden;
        color: white;
        font-family: Inter, ui-sans-serif, system-ui, sans-serif;
      }

      .intro-bg {
        position: absolute;
        inset: 0;
        background:
          radial-gradient(circle at 50% 30%, var(--brand), transparent 34%),
          linear-gradient(135deg, #050816, #111827);
      }

      .intro-content {
        position: absolute;
        left: 150px;
        right: 150px;
        top: 250px;
        text-align: center;
      }

      .label {
        margin: 0 0 28px;
        font-size: 30px;
        letter-spacing: 0.18em;
        text-transform: uppercase;
        color: rgba(255, 255, 255, 0.66);
      }

      h1 {
        margin: 0;
        font-size: 128px;
        line-height: 0.95;
        letter-spacing: -0.07em;
      }

      #intro-subtitle {
        margin: 34px 0 0;
        font-size: 38px;
        color: rgba(255, 255, 255, 0.72);
      }
    </style>

    <script src="https://cdn.jsdelivr.net/npm/gsap@3/dist/gsap.min.js"></script>
    <script>
      const { title, subtitle, brandColor } = window.__hyperframes.getVariables();
      const root = document.querySelector('[data-composition-id="intro"]');
      root.style.setProperty("--brand", brandColor);
      root.querySelector("#intro-title").textContent = title;
      root.querySelector("#intro-subtitle").textContent = subtitle;

      const tl = gsap.timeline({ paused: true });
      tl.from(".intro-bg", { scale: 1.12, opacity: 0, duration: 1, ease: "power2.out" }, 0);
      tl.from(".label, #intro-title, #intro-subtitle", { opacity: 0, y: 36, stagger: 0.16, duration: 0.7, ease: "power3.out" }, 0.45);
      tl.to(".intro-content", { opacity: 0, y: -24, duration: 0.55, ease: "power2.in" }, 3.35);

      window.__timelines = window.__timelines || {};
      window.__timelines.intro = tl;
    </script>
  </div>
</template>
子场景:compositions/feature.html
Feature 场景复用同一个 brandColor,把它应用到三张功能卡片的顶部边框,体现“一份变量驱动多个场景”的效果。
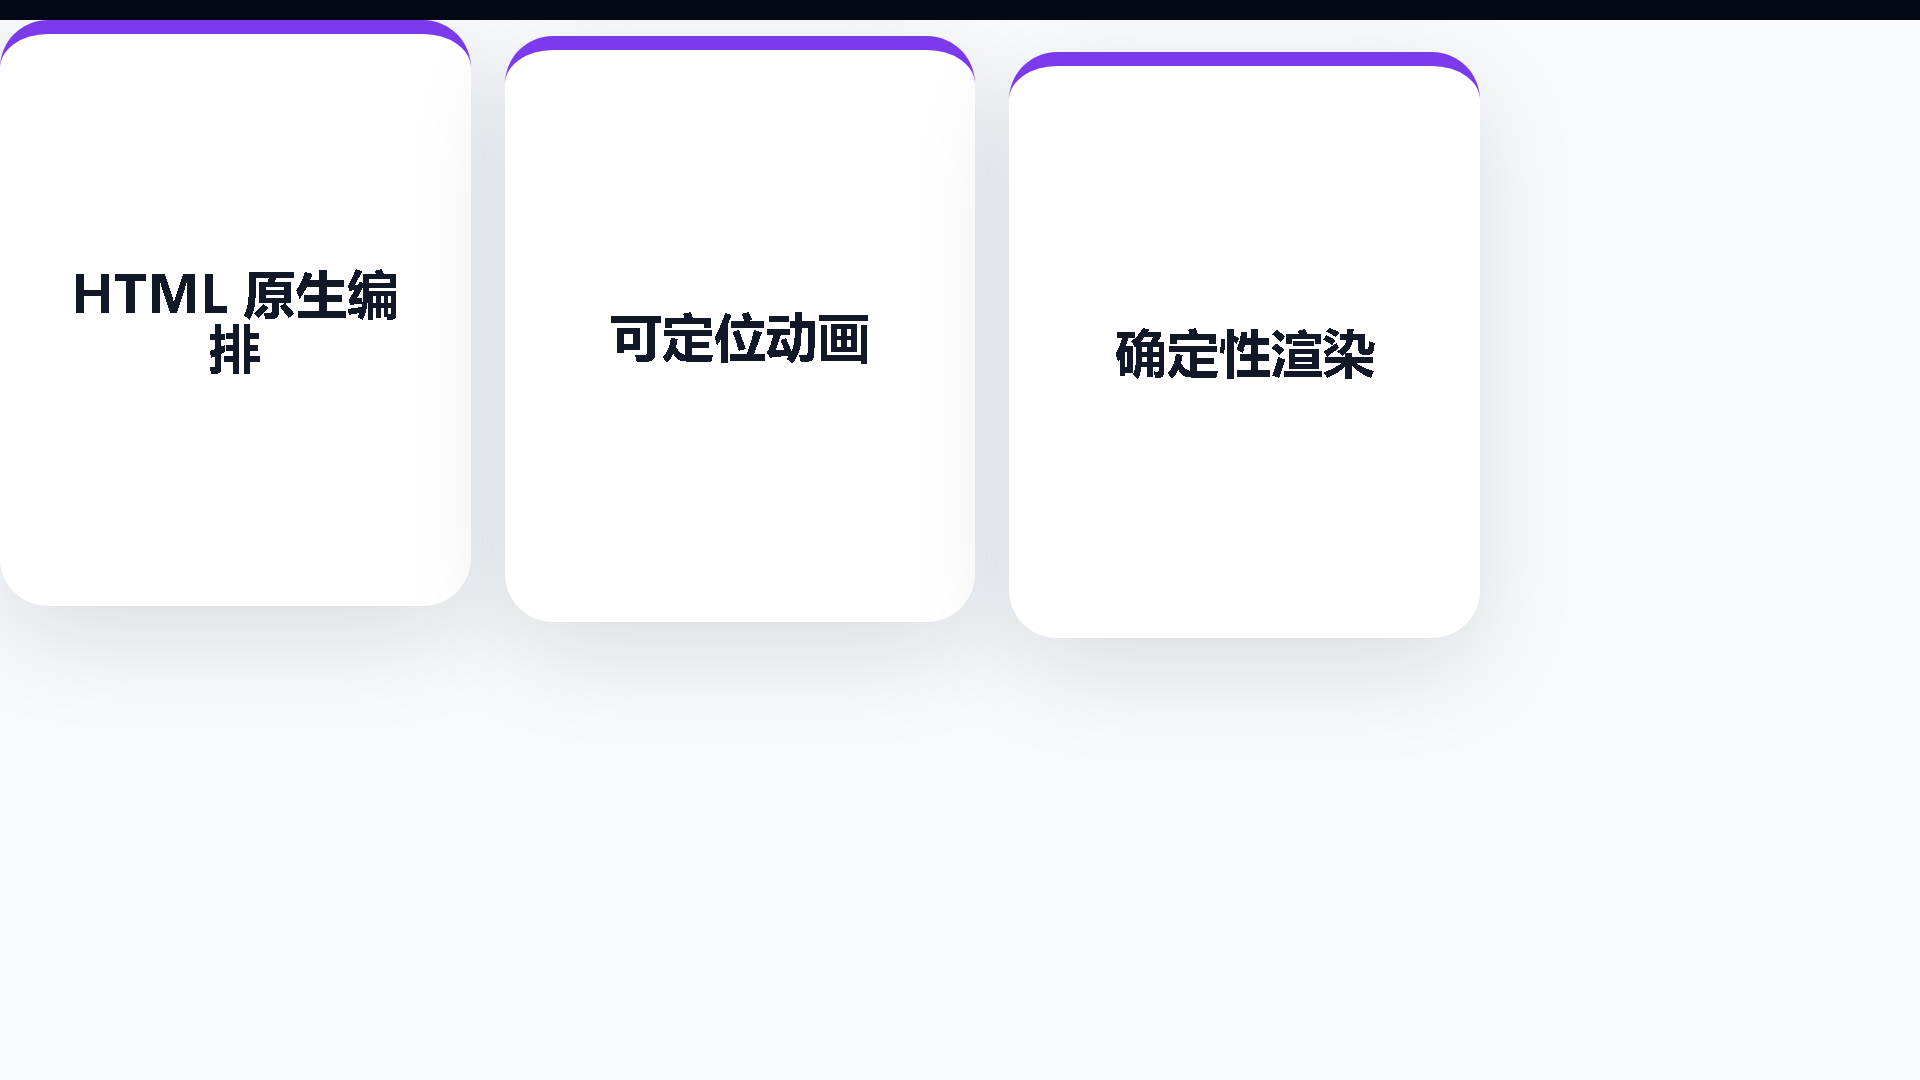
<template id="feature-template">
  <div data-composition-id="feature" data-width="1920" data-height="1080">
    <section class="feature-grid">
      <article>HTML 原生编排</article>
      <article>可定位动画</article>
      <article>确定性渲染</article>
    </section>

    <style>
      [data-composition-id="feature"] {
        width: 1920px;
        height: 1080px;
        display: grid;
        place-items: center;
        overflow: hidden;
        background: #f8fafc;
        font-family: Inter, ui-sans-serif, system-ui, sans-serif;
      }

      .feature-grid {
        display: grid;
        grid-template-columns: repeat(3, 1fr);
        gap: 34px;
        width: 1480px;
      }

      article {
        min-height: 460px;
        display: grid;
        place-items: center;
        padding: 56px;
        border-radius: 48px;
        background: white;
        color: #111827;
        font-size: 52px;
        line-height: 1.04;
        font-weight: 850;
        text-align: center;
        box-shadow: 0 32px 100px rgba(15, 23, 42, 0.12);
      }
    </style>

    <script src="https://cdn.jsdelivr.net/npm/gsap@3/dist/gsap.min.js"></script>
    <script>
      const { brandColor } = window.__hyperframes.getVariables();
      document.querySelectorAll("article").forEach((card, index) => {
        card.style.borderTop = `14px solid ${brandColor}`;
        card.style.transform = `translateY(${index * 16}px)`;
      });

      const tl = gsap.timeline({ paused: true });
      tl.from("article", { opacity: 0, y: 80, stagger: 0.18, duration: 0.75, ease: "power3.out" }, 0.25);
      tl.to("article", { opacity: 0, y: -60, stagger: 0.12, duration: 0.55, ease: "power2.in" }, 4.25);

      window.__timelines = window.__timelines || {};
      window.__timelines.feature = tl;
    </script>
  </div>
</template>
子场景:compositions/outro.html
Outro 场景读取 ctaText 并使用 brandColor 做发光文字阴影,作为结尾行动号召。

<template id="outro-template">
  <div data-composition-id="outro" data-width="1920" data-height="1080">
    <section class="outro-content">
      <h2 id="cta"></h2>
    </section>

    <style>
      [data-composition-id="outro"] {
        position: relative;
        width: 1920px;
        height: 1080px;
        overflow: hidden;
        background: #050816;
        color: white;
        font-family: Inter, ui-sans-serif, system-ui, sans-serif;
      }

      .outro-content {
        position: absolute;
        inset: 0;
        display: grid;
        place-items: center;
        text-align: center;
      }

      h2 {
        max-width: 1100px;
        margin: 0;
        font-size: 108px;
        line-height: 0.96;
        letter-spacing: -0.06em;
      }
    </style>

    <script src="https://cdn.jsdelivr.net/npm/gsap@3/dist/gsap.min.js"></script>
    <script>
      const { ctaText, brandColor } = window.__hyperframes.getVariables();
      const cta = document.querySelector("#cta");
      cta.textContent = ctaText;
      cta.style.textShadow = `0 0 80px ${brandColor}`;

      const tl = gsap.timeline({ paused: true });
      tl.from("#cta", { opacity: 0, scale: 0.92, duration: 0.8, ease: "power3.out" }, 0.25);
      tl.to("#cta", { opacity: 0, scale: 1.04, duration: 0.65, ease: "power2.in" }, 3.2);

      window.__timelines = window.__timelines || {};
      window.__timelines.outro = tl;
    </script>
  </div>
</template>
渲染不同版本
默认渲染:
npx hyperframes lint
npx hyperframes validate
npx hyperframes inspect --samples 15
npx hyperframes render --quality draft --output campaign-draft.mp4
覆盖变量渲染另一个版本:
npx hyperframes render --variables '{"title":"AI 视频发布","brandColor":"#7c3aed"}' --output final.mp4
你也可以直接打开本教程已生成的视频:./hyperframes-zero-to-one-projects/campaign-video/renders/campaign-video.mp4。
Windows PowerShell 中也可以使用转义后的双引号:
npx hyperframes render --variables "{`"title`":`"AI 视频发布`",`"brandColor`":`"#7c3aed`"}" --output final.mp4
到这里,你已经完成了从单文件动画到多场景参数化视频的完整路径。
10. 常见错误清单
写 HyperFrames 时,最常见的问题通常不是复杂动画,而是基础结构遗漏:
- 忘记给定时元素加
class="clip"。 - 同一个
data-track-index上有时间重叠的 clips。 - 根
index.html误用了<template>,导致浏览器里看不到内容。 - 子 Composition 没有用
<template>包裹。 - GSAP timeline 没有
{ paused: true }。 - timeline 没有注册到
window.__timelines["composition-id"]。 - 用
data-track-index期待控制视觉层级;视觉层级应该用 CSSz-index。 - 渲染时依赖
Date.now()、未固定随机数、实时网络请求等不确定行为。
11. 下一步
掌握上面的流程后,可以继续学习:
- Compositions:深入理解 Composition 和子场景。
- Data Attributes:查看所有时间线属性。
- Variables:做可复用视频模板。
- GSAP Animation:写更复杂的 seekable 动画。
- Rendering:了解质量、帧率、Docker 和性能选项。
- Common Mistakes:排查常见结构和渲染问题。